Showing posts with label All About Hair. Show all posts

Sunday, May 11, 2014

Great Mother's Day!


Happy Mother’s Day to all of the Mamas out there!


This was a very eventful weekend! I have started a garden with so many yummy veggies and I will be sharing my tips and growth celebrations with all of you here on my blog!

I also finally did a hairstyle that I have been wanting to do for the longest!

And last but not least, we finally got our mini pool put up and we are waiting on this weather to heat up again so we can jump in with the kiddies!

So I will start with the hair. . .  .

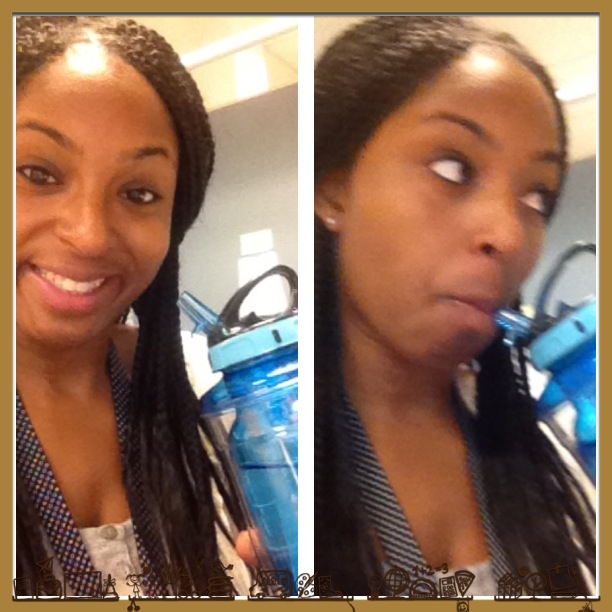
I have been looking for a protective style that I can pull off only using my own hair. I know there are tons of styles to choose from but I am very limited since I have such fine and thin hair. My hair is very healthy but it just grows very thin and it has always been very fine. I wanted to try mini twists but I just knew that would be so “see through” on me J So I discovered Mini Braids for natural hair! I love the videos that I have seen and I figured those would look a little more full on my hair than the twists. Plus twists always unravel in my hair lol.

I know I do a lot of complaining about having thin natural hair but there are perks! Styles that would normally take hours on other people with thick full hair only take a fraction of that on mine J Most of the people who installed mini braids in their hair said it took them about a total of 4-6 hours! I started mine this morning at 8:10am and was all done, including the co-wash at the end, by 11:30am! I’ve only had them in for one day so far and I am loving them! Yes, mine are still much thinner than some other naturalistas but I am still loving it! This is going to be a great summer go to protective style for me!

Tools and Products Used:

·         Cantu Shea Butter Conditioning Cream

·         Small Comb and a Medium sized Comb

·         Motions Wrap hold Foam

·         Co-Washed with Suave Naturals


As stated above the style took me a total of about 3 hours!

 
Let me know what you think J


Thanks for reading :-)


Oh and check out my websites
http://swiftphotoz.weebly.com/
https://www.facebook.com/swiftphotography1?ref=hl

Wednesday, December 11, 2013

My Straight Hair Accomplishment!

Well. . . today I am proud to say that I made it through the whole day with my hair straight! 

After taking a little more than a year off of straightening my hair, I decided to try again a few months ago. Well that was an epic fail! I feel like I have educated myself so much about having healthy hair that I scared myself away from using heat! I had a beautiful flat ironed style at 7 am and by 10 am it was pretty much a fro! :-) Nothing wrong with having a fro but that just wasn't the look I was going for.  

Anyway, last night I decided that I would give it another try. This time I used a new product. I have all of my steps and products listed below. . . . . 


1. I co-washed my hair using Suave Naturals Conditioner

2. I then poured about a nickel size amount of black castor oil in my hands and spread it through my hair (to seal in the moisture)

3. I added my Suave Keratin Infusion heat defense.

4. Once my hair was evenly coated with my heat protectants, I was able to blow dry my hair. (When i blow dry i use a comb on the end of my dryer so that it can assist in straightening my hair)

5. When my hair was dry, I then separated it into 4 sections and added the new product! My magic product is Pantene Smooth Lisse. This product helps with shine and frizz control.

6. Once all of my products her added I then flat ironed it using the "chase method" with a smaller tooth comb.

7. After ironing my whole head I then wrapped it and went to sleep!

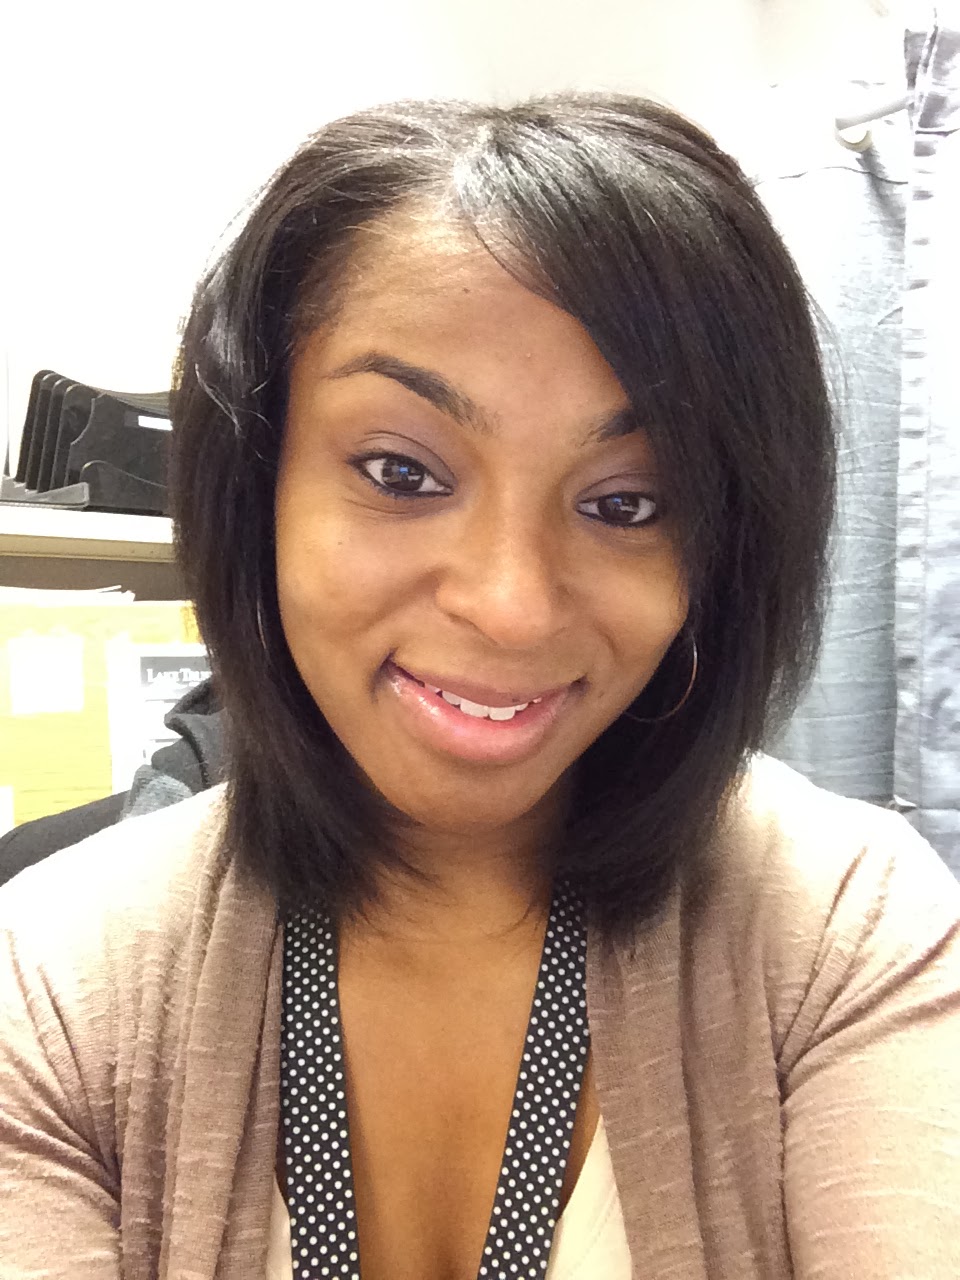
In the morning I combed it out and WALLAH! It was beautiful from AM (left) to PM (right)


I am so excited that I am still admiring my hair and it is currently 7 PM 

Saturday, November 30, 2013

Simple and Inexpensive Deep Conditioning/Protein Treatment

Do you need to do a deep conditioning and protein treatment but don’t want to spend money on expensive hair products. . . . well maybe this will help. Do you have some eggs, moisturizing conditioner and your favorite oil? If so then you have all you need!

Here we go!

Take a look at the picture below and you will see all of the items that you will need to get a good deep conditioning and protein treatment.

You will need: 1-2 eggs, a moisturizing conditioner, oil (I used castor oil, a lot of people use olive oil too), a mixing bowl, a fork or spoon for mixing, a wide tooth comb, plastic cap, a scarf, and a thick headband to catch the dripping liquid.


 STEPS to MIX:

1.       Crack the eggs into the bowl
2.       Add about a handful of conditioner
3.       Add in about a quarter size amount of oil
4.       Stir it up until the mixture looks like the picture below.


STEPS to APPLY:
1.       Start off with 4 sections of freshly shampooed hair.
2.       Apply the mixture to each section.
3.       Take the remaining fluid and pour it on top and let it run down into the hair.
4.       Cover hair with the plastic cap and place the headband around the edges.
5.       Cover the plastic cap with the cloth scarf.
6.       Leave in for 40-60 minutes and wash out with cool water (if the water is too warm you might cook the egg so be careful J)
7.       When you are done apply oil and conditioner mixture and leave in for 20 minutes then rinse.
8.       ALL DONE! You should have soft and strong hair!


Thanks for reading! Share, comment and subscribe J


Saturday, November 2, 2013

Brazilian Curl Crochet Braids

Ok ladies, its winter time and its time to start looking for protective styles! I love doing crochet braids because they are simple, cheap, fully protective of my hair, and I have so many choices for the texture and curl pattern of the hair. This time I chose to go with the Bazilian Curl by Freetress .This curl pattern is very different from my own and this is the first time I have tried it. I am loving it! From what I have read, it can get tangled if you do not maintain it over night, but we should be in the habit of caring for our hair at night anyway right ? I purchased the Motions Light Styling Foam to keep the hair from getting too frizzy. I use this same product on the other super curly crochet styles that I do.


Time Length: This style actually took me about  4 hours from start to finish to complete. I braided the front in small braids then did a horizontal pattern in the back. (Sorry I dont have a picture of the braid pattern, I didnt think about it until I was about half way done)

I plan to keep this style in for about 3-4 weeks. We shall see. . . I am not good at keeping styles in for long, I have hair ADD! I just get bored!

What you will need. . . . .
1. Crochet needle
2. 2 bags of brazilian freetress braiding hair (i used about 1 1/2 bags of hair and i cut the hair in half)


Thursday, October 10, 2013

Fierce Braid Out!

I decided to do a braid out since i am trying to slightly stay out of my hair for a bit. This is a simple low manipulation style that shapes itself overnight. I have a picture posted below with the steps that I have used to create the style. Whenever I do a braid out, I never part the sections, I just grab them and try to use the same amount of hair in each braid. Once I have my section, I spray a little water mixed with Aloe Vera Juice then I detangle. I do this for about 8 braids in my hair. I do this at about 7:00 pm then place a bonnet on and sleep on it. In the morning, I will unbraid the braids with my hands coated with L'Oreal Eversleek Precious Oil Treatment. This oil smells great and it keeps my hair from being dry and dull. Once the braids are all undone, I just fluff it out and make it as big as I can, I love BIG HAIR! Sicne My hair is thin, it tends to get a tad bit frizzy If I dont make sure I add an oil to it. How do you do your braid outs?

Saturday, October 5, 2013

Twisted protective style for the week!

I came up with a cute protective style for the week. Hopefully it will last longer than that! My hair gets very fuzzy pretty quick so we will see how long it lasts.

 I simply braided the sides going toward the back of my head and I took the remaining hair and braided it up toward the top of my head. Before I started I parted and separated out some bangs to the side. Yesterday when I first did the style I put rollers in and curled my bangs with those. Since I want the style to last longer I decided to twist up the hair left out. I used my Shea butter mix and loc and twist gel to hold my twists. 

On day 2 I am very happy how it turned out. Normally I can't get my twists to look very good since my hair is kinda thin. Let me know what ya think! 


Thursday, September 26, 2013

3 Month Supplement Challenge!


Hey there everyone! As I have been searching through videos and blogs, I have seen many people, with the goal of growth, doing biotin challenges. I have seen numerous brands of vitamins that girls have been using (links below for different brands). Since my ultimate goal outside of healthy hair is growth, I have decided to see what a vitamin could do for my hair as well.  After doing research and looking at many reviews and ingredients I have decided on the SpringValley Hair Skin & Nails vitamin. I purchased this bottle at Walmart. Out of all of the vitamins that I looked up, this was one of the inexpensive ones. If there is one thing you will learn about me, you will learn that I love to save money! J I have been using this vitamin for about 3 days now (in my own regimin) and I will continue to use it for 90 days! I am very curious to find out how or if these vitamins will affect the health of my hair and its growth. From what I have learned, if your hair grows when a vitamin is taken, that must mean you may have been lacking certain vitamins. Well we shall see! I have listed the ingredients of the Hair Skin & nails pill below. The bottle recommends 3 pills per day, however, I do not want to shock my body so I am starting off with one pill per day for the first week then I will bump it to two pills a day and eventually go to the full dose. Also as a side note, I also recommend that you either run this by your doctor or have a basicmetabolic panel done so that you know what you may be deficient in.

Vitamin A (as RetinylPalmitate)
5000 IU
Vitamin C  (as Ascorbic Acid)
60 mg
Vitamin D (D3 Cholecalciferol)
1000 IU
Vitamin E (as dl-Alpha Tocopheryl Acetate)
15 IU
Thiamin (Vitamin B-1)
5 mg
Riboflavin (Vitamin B-2)
2 mg
Niacin (as Niacinamide)
25 mg
Vitamin B-6 (as Pyridoxide Hydrochloride)
5 mg
Folic Acid
200 mcg
Vitamin B-12 (as Cynnocobalamin)
8 mcg
Biotin (as d-Biotin)
3 mg
Pantothenic Acid (as d-Calcium Pantothenate)
15 mg
Calcium
200 mg
Phosphourus
90 mg
Magnesium
50 mg
Zinc
7.5 mg
Manganese
2 mg


PLEASE NOTE!!!!!

Most any multi vitamin will help with overall health but we all need to make sure that we  avoid trends as far as using mass doses of supplements that are intended for other purposes. I have heard of people getting major breakouts and or health problems for the sake of attempting to find a magic growth pill when they don't exist.

Ultimately we do need to remember that eating well, drinking lots and lots of water, and good hair handling habits will eventually produce results. We all have to play around until we find a system that makes our hair say, "ahhhh, that quenched my thirst!"

Since your hair is already growing, you need retention. So if you choose to do a supplement challenge use the extra growth as a tool to figure out your system of how you can retain all of the growth! Chances are, you are losing hair as fast as you are growing it and not seeing any progress but you can fix it.

Let me know if you decide to join me! Comment below and let me know your results as you go along J

Tuesday, September 17, 2013

More Water = Healthier Hair!

So, I know that to many of us this may not be a huge surprise but one of the reasons why we cant seem to get our hair to grow healthy may be because we are simply not drinking enough water. I always think that I am drinking enough but when I think about it, I really could use more. I decided to practice what I preach and start drinking the recommended amount (half your body weight in ounces or 8 ounces a day) and keep track of what the results were. Even after about a month I could see a huge difference in my hair, skin and even my energy! I have listed a few tips on how to fit in all of your water each day J.

6 Ways to Sneak More Water Into Your Day

1.     Carry around a cute water bottle and make sure that you drink it all and refill it at least twice in your work day.

2.     When you have juice (apple, grape, or orange) fill half the glass with water.

3.      When you have a junk-food craving, down a glass of water immediately. You feel full
     quickly and avoid the calories, and it lets time pass till the craving fades.

4.     Freeze small pieces of peeled lemons, limes, and oranges and use them in place of ice cubes - it's refreshing and helps get in a serving or two of fruit.

5.     After each trip to the restroom, down an eight-ounce glass to replenish your system.

6.     Drink a glass of water immediately after waking up.


If you see that your hair is always dry and sucking up every product you apply,it may be due to you hair roots lacking adequate H2O levels. It is very important to hydrate your body with water, which is transported from the roots of your hair down to the tips. Your roots soak up the water from inside and hydrate the rest of your hair.
Good Luck and Happy Drinking! J


Comment with your tips on how to squeeze more water into your day

Saturday, September 7, 2013

Caring for my hair in Box Braids

So, I have a great protective style for the end of summer/beginning of fall. I have wanted box braids for some time now, but I am too lazy to do them myself so I had someone do them for me! She did a great job!!!!!! Even though my hair is braided it is very important that I still make sure that it is well taken care of underneath! I have listed my regimen below. 

Before braids are installed:
1. Normally I would do this a few days before but I was pressed for time. . . but anyway, the night before I got my braids, I washed my hair thoroughly.
2. Once my hair was washed I did my protein treatment using Hair Mayonnaise. (I’m working on making my own protein treatment mixture and will be posting that soon!)
3. When I was done letting the treatment set in my hair, I washed that out well with my shampoo, and I conditioned my hair.
4. Once my hair was mostly dry, I massaged my oil mixture in, pulled it back into a ponytail, and then hit the road to get my hair done!
Daily: 
1. Put my oil mixture on my finger tips and massage it into my scalp and roots.
2. Spray with water and leave in conditioner mixture in order to seal in the oils

Every 2 Weeks: 
1. Wash with a diluted shampoo and condition right after.
2. To dry my hair I use a towel and just gently run it down my hair.
3. I then massage my oil mixture into my scalp and roots
4. Then spray in a leave in conditioner
5. Once these steps are completed I wrap my braids up tight in a plastic cap and then wrap a cloth scarf around it and sleep.
6. In the morning I just repeat my daily routine.

 When I remove my braids I will write about what I do after I take them out. :-) Please be sure to pass this on to your friends, share your ideas, follow and comment :-) Thanks for reading!

Tuesday, September 3, 2013

Flax Seed Gel

So, I have been reading a lot about different homemade products and I am so excited that I can’t seem to find time to make all of them! I have been watching a lot of videos about flaxseed gel. After throwing a ton of products together, I have finally found the formula for my perfectly defined curls. Well, I found a way to make my curls really pop! FLAXSEED GEL!!!I found several recipes for the gel but the one I like the most is shown here. This is probably the most simple homemade hair product there is and you can easily customize it for your hair. This gel requires WATER, ALOE VERA JUICE, FLAX SEEDS, THE OILS THAT YOUR HAIR LOVES BEST AND A LITTLE BIT OF YOUR TIME! This gel has defined my curls better than any store bought gel. Also, I did not have as much shrinkage as the other wash and go products I use. Try it out! The video I posted a link to makes it very simple for you to follow. Let me know what you think! ~ 1 CUP OF WATER ~ 1 CUP OF ALOE VERA JUICE ~ ¼ CUPS OF WHOLE FLAX SEEDS ~ ESSENTIAL OILS- PEPPERMINT, CASTOR, JAJOBA, VITAMIN E, COCONUT

Saturday, August 24, 2013

How to Avoid Itchy Scalp with Synthetic Weaves :-)

Have you ever installed a really cute sew in and starred in the mirror looking forward to the 3-6 weeks of convenience you have coming your way and the minute you start to fall in love, you feel an itch in the front, back and sides? Well. . . . This same situation has happened to me multiple times actually. I even installed a sew in/crochet style and took it out in 2 days because I thought I was allergic! I was so disappointed because it took me about 4 hours total to put in and I really loved the style but my head felt like there was a pound of itching powder in it! After a little research I have found that it may not necessarily be an allergy to the weave, but the chemicals used on the weave may irritate your scalp. Most types of synthetic weave have an alkaline base designed to make the hair softer and shinier. After reading up on this topic and experimenting for myself, I have an easy solution. All you have to do is simply wash the hair before installing it using these ingredients listed below: Ingredients: 1. Vinegar (Apple cider or white) 2. Clarifying Shampoo Steps: A. Fill your bathtub about less than halfway full with warm water. B. Pour about 1 ½ Cup of the Vinegar into the water. C. Next you are going to remove your hair from the pack (still keeping it banded together because synthetic weave can be messy) and place it neatly in the water and vinegar. For about 15 minutes. D. After the 15 minute you will gently shampoo the hair and then rinse it in the water. E. Last you will hang the hair to air dry. You may need to finger comb through it but you should be good to go once it is dry. Check out the link to one of the best example videos that I could find. She makes it very clear what to do. Enjoy!

Saturday, August 17, 2013

Perfect Curls!

I am so excited! I finally figured out the products that work for me to help define and moisturize my curls with my wash n go! I have attempted so many different combinations of products but I finally found the perfect recipe and I am excited to share it! 1. First I washed my hair using my Shea Moisture Curl and Shine Shampoo a. This was done the night before, so when I was done washing I used the Shea Moisture Restorative Conditioner. b. Once the conditioner was rinsed out, I used Suave Professionals Almond Shea Butter Conditioner as a leave in and I separated my hair into 4 twists and wrapped it up so that I could sleep 2. In the morning, I took the twists out carefully (making sure I didn’t separate any of my curls). After the twists are taken out, I squirted a few sprays of water mixed with leave in conditioner on my hair. I also coated my hands with a little bit of my Perfect Results Curl Definer to rub through my hair and bring out the curls. 3. Last I take about a quarter size amount of the Olive Oil Eco Styler Gel and rub it through my hair to get my curls to pop! 4. All Done! I will probably stretch this wash n go out about 3 more days What steps do you take to define your curls? Please share!

Wednesday, August 14, 2013

My "Essential Oil" Mixture

Ok everyone, so here goes. . . . I am very big on trying to make sure that I keep my scalp and hair well moisturized. I am a huge fan of plain old water, but I do like to add a mixture of oils to my almost daily to strengthen and grow my hair. There are many mixtures listed online but this is what I use: (don’t mind the odd numbers, I’m just weird like that) ~11 drops of Tea Tree Oil, ~5 Tbs. of Jojoba Oil, ~3 Tbs. of Castor Oil, ~11 drops of Peppermint Oil, ~and 3 Tbs. of Sweet Almond Oil. Each of these oils adds something different and useful to the mixture. They are all important for their own reasons.

Tea Tree Oil: This oil will help to unblock the hair follicles, which eliminates dandruff. Tee Tree oil also helps to moisturize the scalp and hair preventing hair loss and treating cradle cap. This oil is also very effective for hair growth.
Jojoba Oil: Those of you who are extremely bothered by dull and frizzy hair can apply this oil to improve its texture and appearance. It serves both the purposes of hair oil as well as hair conditioner. It moisturizes the scalp, provides protection against dandruff and adds strength to the roots of the hair. Thus, it can control hair fall to a great extent.
Castor Oil: Castor oil is an awesome hair oil, but it can be very thick and viscous. Some people may have a bad hair experience with the oil. Still this oil is great for the health of your hair and scalp.
Peppermint Oil: Peppermint oil is known to stimulate hair follicles and thus promotes hair growth. Peppermint oil is good for your hair because it works as an effective conditioner and adds shine and gloss to your hair and giving it more bounce. Peppermint oil is fast becoming popular as effective hair care oil because of inherent hair rejuvenating properties. However, it should not be used without diluting as it can affect your hair and scalp adversely.
Almond Oil: This oil helps to nourish hair and smoothes the hair cuticles. Almond oil assists in making the hair long, strong and thick. This oil also adds shine to the hair and the smell is amazing! Almond Oil also helps to protect hair from heat styling.
I hope that this list can be helpful to you. You should alter it as it fits your hair. Enjoy! :-)

Friday, August 2, 2013

Senegalese twist crochet braids

Ever since I learned about Senegalese twists I have wanted them! However, I'm nervous to get single braids that small in my hair because its so fine and I would hate to tear it out with some braids. So when I did my usual searching the web for another option, I can across pretwisted Senegalese braids! They were only $1.99 per bag! So as usual, I you tubed it and found that other women had tried it and I went ahead and placed my order! My package came in about 4 days and I was so excited!!!! I opened my box ( I ordered 10 bags, there weren't many braids in the pack) and I braided my hair and started installing them. It took me about 4 hours to get them all in and it looked great! I got so many compliments! I was stopped out in public so many times by people asking who did my hair. Even another girl with Senegalese braids (yes the actual braids) came up and asked who did mine! When I showed her that they were crocheted she was blown away! I know this is a style I will be doing again for sure!

Cornrows to beat the heat!

Since it was so hot the past few days I needed something to get me through the hot weather. Yes wash n go's are nice, simple and cool; however, with this humidity, I can only take my hair getting so big before it must be tamed lol. So I grabbed me some $2.99 yaky hair from the beauty supply and went to town!
I place setting curlers on the ends of the braids so I don't have to cut them, hey just curl up nicely..... 

This braid style was done just before my 2nd little princess was born I couldn't be in labor sweating my hair out lol. 


Givin the hair a break

Every now and then when I come out of a braid or sew I'm style I like to let my hair rest. The best way for me to do that is by sporting a cute wig! Yes I'm not afraid to throw on a wig on top of my full head of healthy hair. People ask me all the time, "Why wear a wig or weave when you have lots of hair?" My response is this. . . In order to keep my hair healthy sometimes it needs a rest from styling, and for a girl like me a simple ponytail just won't do! If I can still rock a cute hair style while my hair is protected underneath, you better believe I will do it :-) below is one of my favs

Thursday, August 1, 2013

Sew in/crochet styles

Ever since I discovered how to do a crochet style I have been in love with this protective style. Now, everyone remembers the old school crochet braids from back on the day, well now you can do an easy style that's a tad more mature and current with free tress bulk braiding hair. It's almost like a sew in but just installed a little different. It's a great protective style that anyone can learn to do as long as you can braid. Some people even just do twists underneath. I have done this style using several different types of hair. Many times when I want to be lazy I will just sew in the back and crochet the front. It usually always turns out great! Just make sure you don't make it too thick.....


Found a Way to make my curls stick!

So. . . . .Remember how I was complaining that I couldnt get my curls to stick and stay curled all day. . .? Well, i found out that no heat is the best way to go (at least for me it is). When I sat with freshly washed hair and only added my shea butter mix (ingredients coming soon)to seal in moisture, the curls stay longer. I just use the hard plastic rollers when i do a wet set. Some people will sleep on it over night and hope for dry hair in the morning (thats me :-) ) But other people will sit under a dryer, its really up to you. I have found that the plastic rollers work better for me than the soft ones for this particular style.

Another reason why I am so excited about this style is becasue it looks nice still after a few days. I have a hard time finding styles that will last more than a day on my hair but this one does the trick :-)

The big droop!

This is what I mean when I say it's a waste for me to use heat.......
I spent all night curling my hair and then adding a roller while the hair was still hot.... Then in the morning my hair was all curls. As you can see they didn't even last till dinner lol 

Curl formers!

Not sure how many people use these but I was super excited when I found out about a way to curl my hair without using heat! I found the tutorial from YouTube then I ordered an off brand of the product. The curl formers worked great on my hair. All I did was take small pieces of my hair (making sure they were detangled) and spray some water and add my Shea butter mix then put the curl former on! It took me about an hour to finish my whole head. My hair is thin so it was pretty quick! The results were great both times I tried them!